Here, You’ll learn how to add adjustment layer in premiere pro projects. It’s not a rocket science and this is very easy task but still people are asking for this tutorial. Hence here it is a small post to clear things out.
| Step Number | Action |
|---|---|
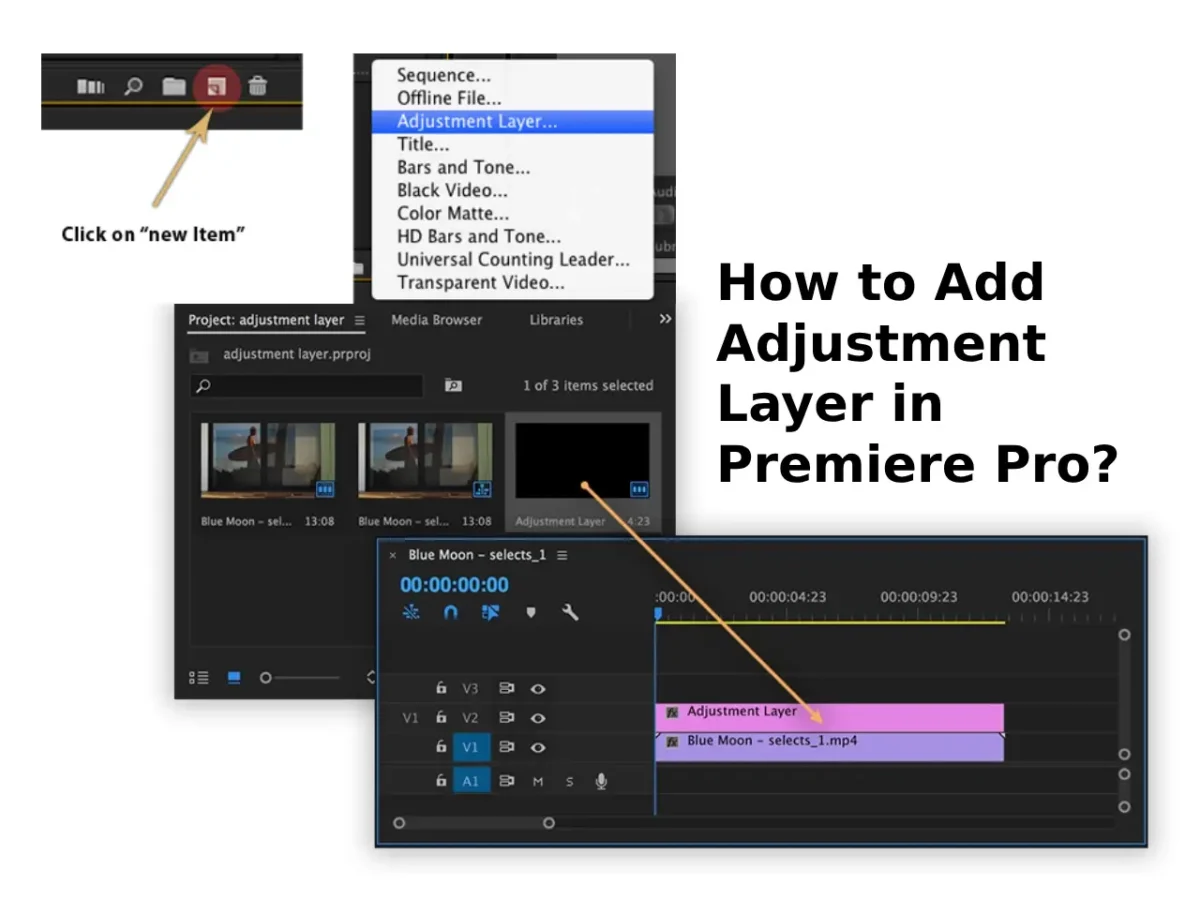
| 1 | Select Adjustment Layer in the New Item menu in the Project panel. |
| 2 | Drag the adjustment layer onto the timeline above desired clips. |
| 3 | Access Effects Control panel to adjust the Adjustment Layer. |
| 4 | Apply video or audio effects by dragging them onto the layer. |
| 5 | Edit and customize the adjustment layer as needed. |
- Select Adjustment Layer: In the Project panel, click on the New Item button. From the drop-down menu, select Adjustment Layer.
- Drag to Timeline: Drag the adjustment layer from the Project panel to the timeline. Place it on a track above the clips you want to apply effects to.
- Adjustment Layer Settings: Go to the Effects Control panel. Here, you can add various effects to the adjustment layer. These effects will affect all the clips beneath the adjustment layer on the timeline.
- Apply Effects: Drag and drop video or audio effects onto the adjustment layer in the Effects Control panel. Adjust the settings to achieve the desired look or sound.
- Edit and Customize: You can trim, cut, or move the adjustment layer like any other clip on the timeline. Any effects applied to the adjustment layer will automatically adjust to the duration of the layer.
And that’s it! You’ve successfully added an adjustment layer in Premiere Pro, allowing you to apply effects uniformly to multiple clips.